3DS Max
The start of modelling in 3DS Max, the first objects i ever did was model a box and a barrel.
The basics of 3ds Max are learning the standard primitives which are the box, cone, sphere, geosphere, cylinder, tube, torus, pyramid, teapot and plane.
These are the standard primitives that you use to create buildings, cars, weapons, and loads more. you go from a simple box to a high detailed building in a few hours if you are good enough.
The small square in which says front is to rotate around the scene or you can hold alt and the mouse wheels down to also rotate.

I will now show how the vertex, edges, border, face and element effect a shape you are using in editable poly. Before i start editable poly is something that we use to edit faces and points on a model which then allow you to change stuff.
1st part of editing is learning what this is the red selection tools are this one is the vertex and this allows you to edit all the points of an object and then you can move them up and down and side to side just like if you was moving a whole model.
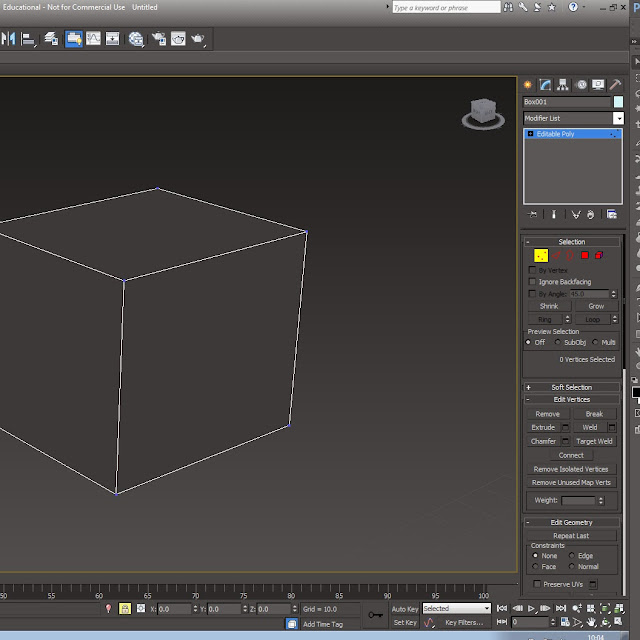 This is the edge tool and it allows you to edit the edges of objects and you can move up or down to get the right shape you may need.
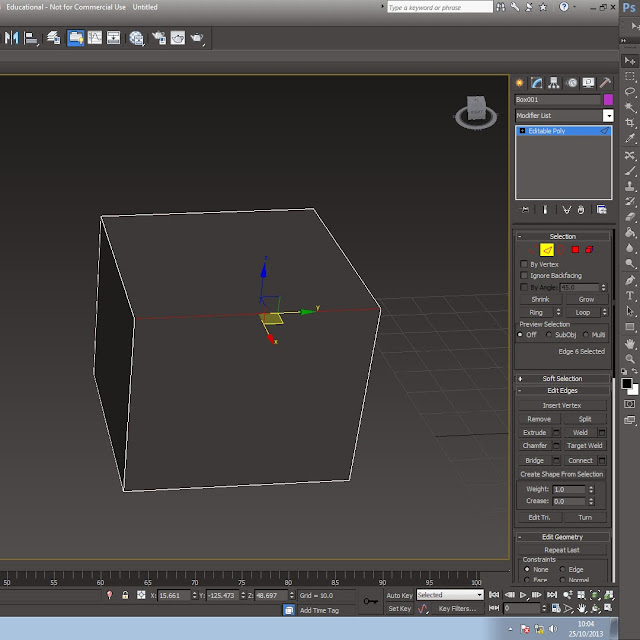
The border allows you to fill a whole in a model, you can click on the button on the tab which you can see is called cap and that caps the hole so it is a solid face again, you can only use this if there is a hole as the border option isn't something you would use because if a face was there you would click on edge and "ctrl" to add over edges to the selection.
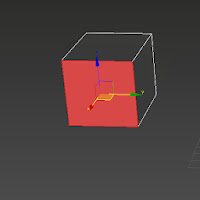
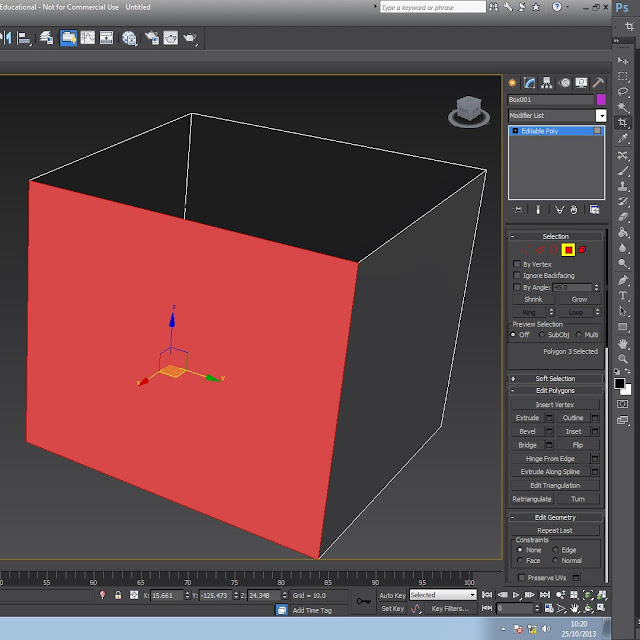
This is the tool which is the red square on the tab bar which i haven't included in this image but this allows you to pull it out and make it a bigger shape without making a new edge. To make a new edge you can click on the button in the image below called extrude and this does the same thing but you create more edges and faces and this then allows you to do so much more.
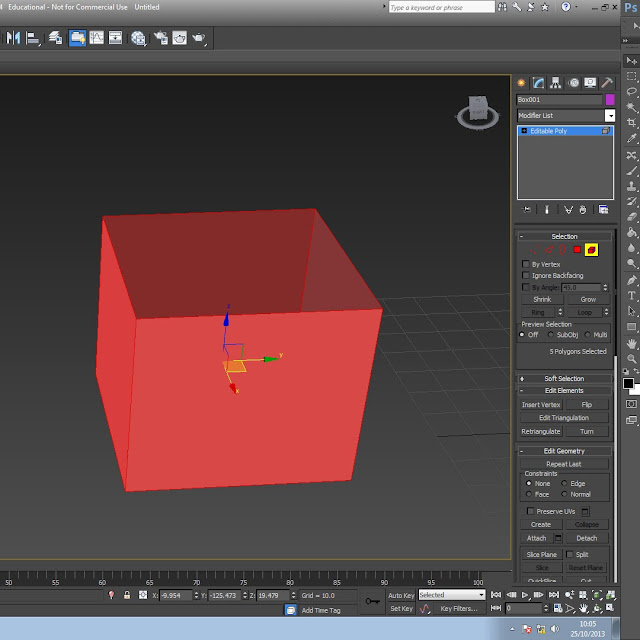
The final primitive is the element button and this hightlights the whole object that are are selecting and then with this you can it around and see all the faces. The dark faces and the light faces are different, this is because it shows you the faces that are on the outside and the and inside, the bright red faces are all around the object and will be able to be textured but then the dark faces show where can't be textured. To be able to texture the inside you can use the button on the modifer list called shell and it creates a slim edge but creates more polly's and tri's but it gives you an option to have a a different texture in the object as they are new faces. The shell tool is one option that you can use.
This is the final outcome from the task of creating a box and barrel.
https://sketchfab.com/show/a95b5546d86c4c86b75de8fe82b51566 link to box and barrel.
Unwrapping - when you unwrap a box or barrel, it comes out like so. it is a net which you paint over with a texture and then when the texture is complete the 3d model will have the texture placed on the model in 3ds max
This is the start of the unwrapping process, you click editable poly and then Unwrap UVW, and then open UV editor and then you get that pop up and then you get this image where you have to click and drag and re-scale to fit in the small checked box. The image shows a red box which show the faces and then you have to save it and then bring it into photoshop to edit and make into the texture for what ever it needs to be.
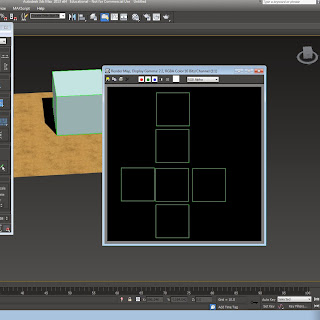
To do a cylindrical unwrap you need to select a cylinder primitive and then follow same instructions as unwrapping a box but you click on cylindrical unwrap instead of planar map.
You then do the same process but the unwrapp is a cylinder and will unwrap like if you cut down the centre of a can of coke and pulled it apart it would be a long rectangle when it is open.
For this task we had to unwrap the back to the future car. The delorean already had a pre-made texture, our task was to match the care faces to the unwrapped texture.
Texturing is a vital part of the 3D process, you need to be able to unwrap to get the most out of the models you create, a single texture can give a model so much more depth and character, so it is vital to make sure that the textures are correct and tidy.
In this image you can see the texture map which is already been applied, you then have the faces sized and made to fit each area, for example all four car wheels, will be on top of one and other as they all look the same so there is only need for one wheel on the texture.
This image shows us which areas are highlighted and which are not, the highlighted areas will not have the correct texture on as the unwrap is not in the correct place so it will look strange and of balance.
The image shows us that all of the textures are in place on the unwrap and the car textures look in place so it now looks complete.
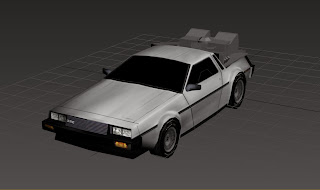
Another part of this task was not just to have the textures in the correct place, but we also had to build other parts onto the car, I did the large rockets and power supply on the back of the car which was a unique part of the car from the films.
https://sketchfab.com/show/73df3f6f714944b6b3f52388759986a7 link to the model of the car.
Tile Texure
This method works well for buildings, stand alone walls and floors, i have taken this stand alone image of the floor. i then took this image and put it into photoshop. I then used the spot healing button and content-aware button. With this i took off all the leafs and rocks to make it flat so it looked like a tile texture and can be doubled and dublicated to fit any region size.
The model is the bottom image and shows how the texture is tiled, and how it has tiled itself over a number of planes,
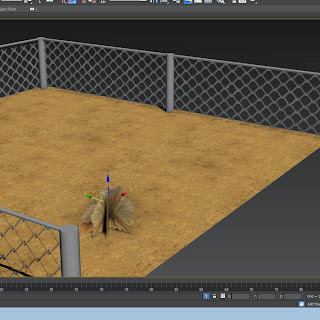
this image shows the floor with the texture on it and how it shows off being known as a tiled texture.
Alpha Map, this method has been used in the imdustry for years, it is used for many different uses from chain fences to trees and grass. The first step is to get you piece of grass or fence and then put it in photoshop and then make it black and white which is the alpha map, the piece that is seen is the white part and then the other bit is black which wont be seen as it becomes see through. You keep the colour copy as well as that is the defuse copy and with that you put it into 3ds max on the material editor and choose bitmap and then put the defuse copy in first and then click on go to parent and then click on opacity and then choose the Alpha Map which then makes it see through when you click on show in viewport. The image shows the viewport selection tabs.
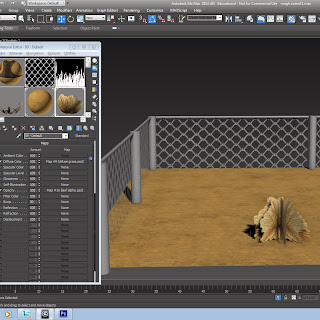
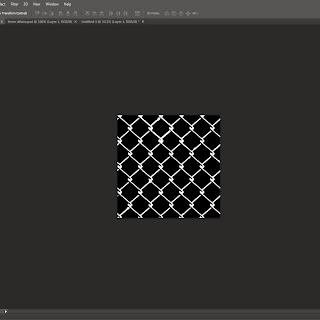
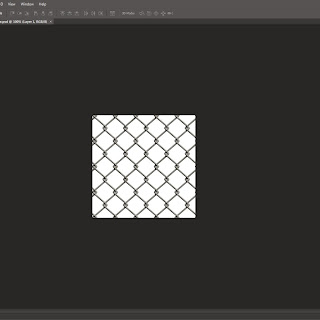 The two photoshop images show how doing alpha maping in 3ds max looks. The images i have here are two different shots of a fence but it could be anything, it could be a red blop on one background which would be the colour image and then a pure black background with white blobs and then the colour blob is goes behind the alpha map image and then you can only see the white blobs, but in 3ds max the bounding box will still be there as it is still a square plane even though the plane has maybe a fat blob. This is shown well with my fence alpha map and you can see the fence and the holes that are see through, but this is because the black spaces are see through and the white bit is part of the object that gets seen in 3ds max.
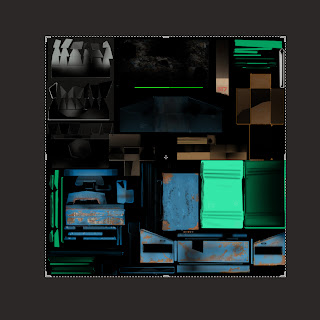
The project that i was doing and have been working hard on today has been the bin design. With this project I have included the use of ambient occlusion which basically creates shadows and makes it seem and look more realistic. This is step one, the first step is in Photoshop and you need to make sure that you have all of the layers that you have been using flattened until its one layer.
This image shows the UV-unwrap, as a normal Photoshop file. Then the next step in Photoshop is to give it a sense of realism and depth, this is created with the help of ambient occlusion.
When the file is imported into Photoshop from 3DSmax the image is black and white, this is then placed above the colour image and you click on multiply which is on the layer selection tab where it normally says normal. you click on that drop box tab and then this list pops down with the different options. You click on multiply and then you get the final look for your object. You now put this saved file into 3DSmax and put it in the material editor like normal and then place this image link in the defuse section.
This is the beginning before the Photoshop steps, you need to make sure you make the material editor a mental ray and then you can proceed forwards by clicking off this.
The next step is making sure that you have all of the items attached, then you make sure that all of the little bits like element type the height and width is all set to your points, for example the height and width needs to be the same size as the Photoshop file, mine is 1024 in Photoshop so I have made sure that it is the same in 3DSmax.
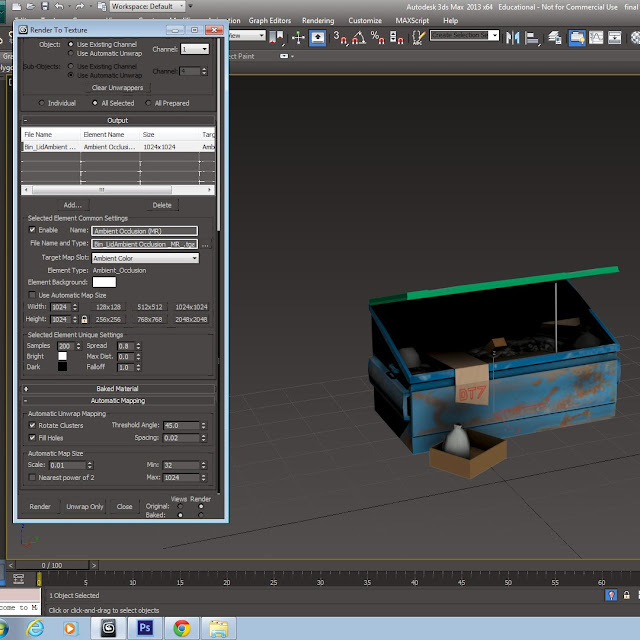
This step is the next step and with this you need make sure that the file is outputting to the correct file path. then you can go down and click on render and then you go back into Photoshop to proceed forward.
This is a link to my final bin.
Animation
In animation there are 12 principles set by Walt Disney animators Frank and Ollie (Insert surnames) that are important to create a realistic animation.
One of these and perhaps one of the most important is squash and stretch. Squash and stretch is something that is used in animation, it is used to give it character.
In the case of a bouncing ball:
Squash = ball hitting an object
Stretch = Ball moving fast or falling
The purpose of squash and stretch is to show weight and volume /mass of the ball.
Lots of squash and stretch = it would be something like a bean bag, or stress ball, if you through it it will squash because of the material.
Minimal squash and stretch = items with minimal squash and stretch could be a ball like a bowling ball which if dropped it would not have a lot of stretching or squashing because it is a heavy item with a lot of volume unlike a stress ball which would have less as its lighter.
Here is my example of a bouncing ball.
Start with a round ball, as it falls the ball stretches to show the mass of the ball and gravity 'pulling' on the ball. At the point it hits the floor it squashes... showing.....
When the ball is falling it will also have it applied as it will become a bit thinner and longer as its falling, but this only applies to balls that will be at a quick speed and if they are light, a bowling ball for example wont have much of a different shape because it is a heavy ball with a lot of volume.
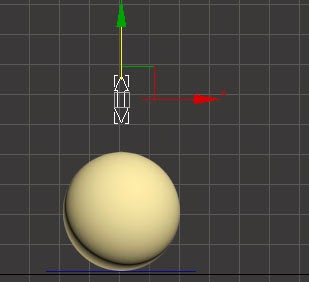
Then timing and spacing come into effect as well, a if an object is going to hit the floor fast for example, the image below shows an animation bar line from animating in 3ds Max, if there is more numbers being used like 5 - 10 the animation will be slower compared to if an object was using 1 - 3, if the object was using 1 - 3 it would be a lot faster. So if the movement is quick it will use less frames, but if it is using more frames it will be slower.
This image shows timing and spacing, it has a timing of 20 frames and then the spacing shows how fast it will be the more, the bottom one is very robotic and has even spacing, and then if it has a large spacing between frames it is fast but then if it has a shorter spacing the animation will be slower.
Overlap and follow through.
Overlapping and follow through is something that is used in animation a lot. In the images below show what this principle is, it is something that gets used in items that swing like this ball on the string, the weight would have a certain effect, but in my animation the ball would be quite heavy so the exaggeration of the swing would be a lot, the timing of the drop has effect on realism so you need to make sure that it is all correct.
This diagram shows overlapping and follow through, one example is there the bar is the parent and the drag is the child, if the parent moves the child will drag behind but when the parent stops, the child will overlap and then when it s curves it depends on weight, then it shows how fast or slow it is.
The 7 images shows how from when the animation comes down the tail is behind at a high point and then when it stops the tail swings right to the opposite side with speed and then it will slowly stop before continuing along the course.
Anticipation
One example
This shows anticipation, in a image from a book, the anticipation is where the guy gets ready to jump and the movement he does just before he does jump, like when he kneels and the jumps up, so it uses timing as well as other components like squash and stretch.
Staging
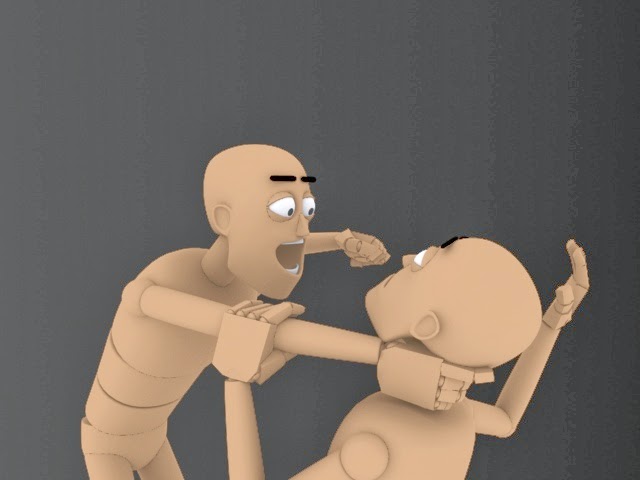 Staging is a presentation of an idea, it will include personality, and then the expressions of the character will represent a mood, in my image the mood is bad as the one man is getting strangled and being threatened while the other one is in pain and scared, you can see this clearly with the hard movements
Idle
Idle is where an object will be stood still be will still have a slight animation to it, whether it be just a foot tap. The model can have a breather animation which gives the character personality instead of it being a dull dead still character when stood still.
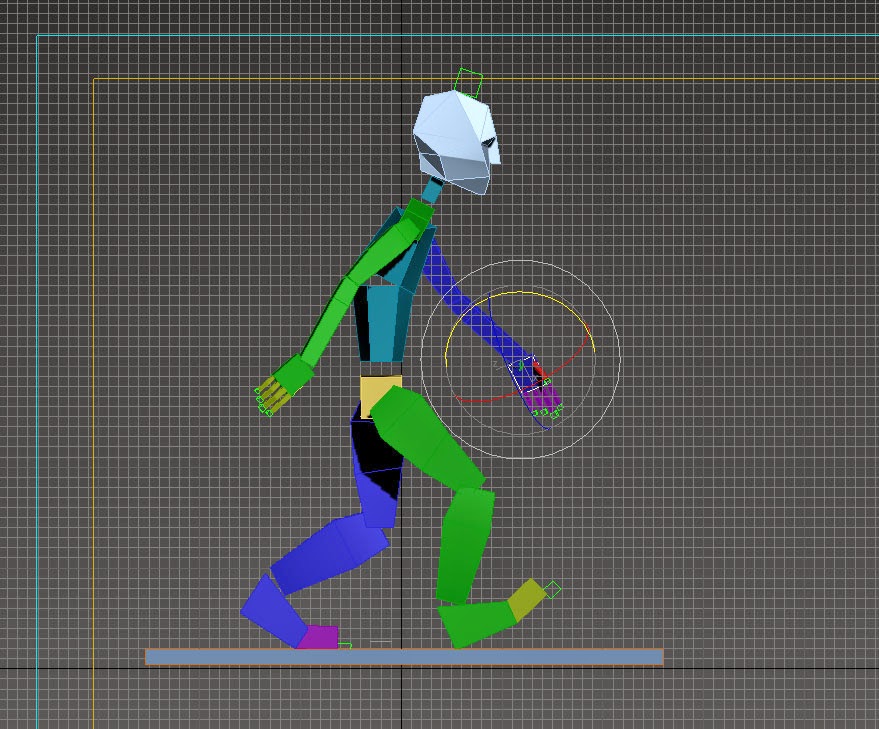
Walk Cycle
Dying Animation
Killing Animation


No comments:
Post a Comment